Get up and running with Bonsai in under 10 minutes. Create an account, provision a cluster, index your first document, and run a search query. Everything you need to get up-and-running with Bonsai.io for a production-ready Elasticsearch/OpenSearch setup.
Create an Account
Before you can create indexes and run queries, you'll need a Bonsai account.
Sign up at bonsai.io
Visit app.bonsai.io/signup to create your account.

Verify your email
After signing up, check your inbox and verify your email address before continuing.
Continue to dashboard
Once verified, click to continue and your first cluster will begin provisioning automatically.
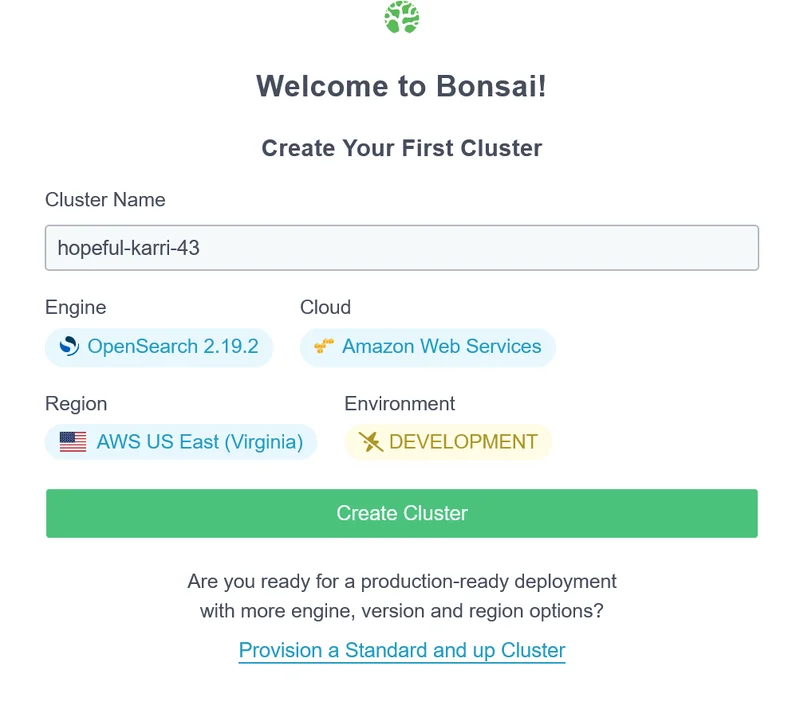
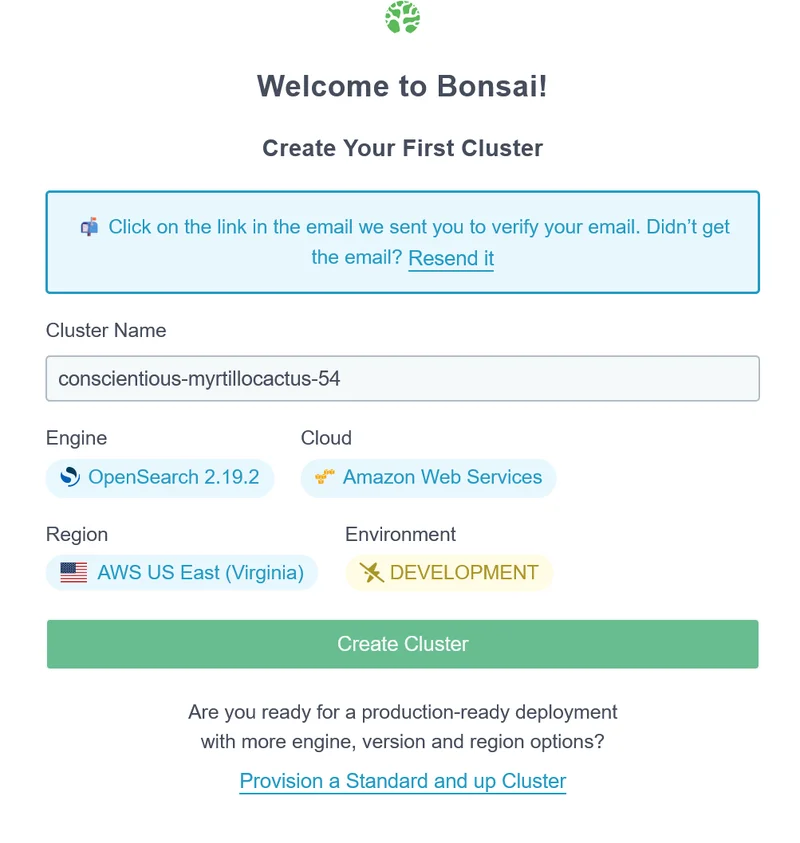
Create a Cluster
Your first cluster provisions automatically when you sign up - manual configuration needed. Bonsai handles the infrastructure, security, and maintenance so you can focus on building search features. Deploy on AWS or GCP in the region closest to your users.
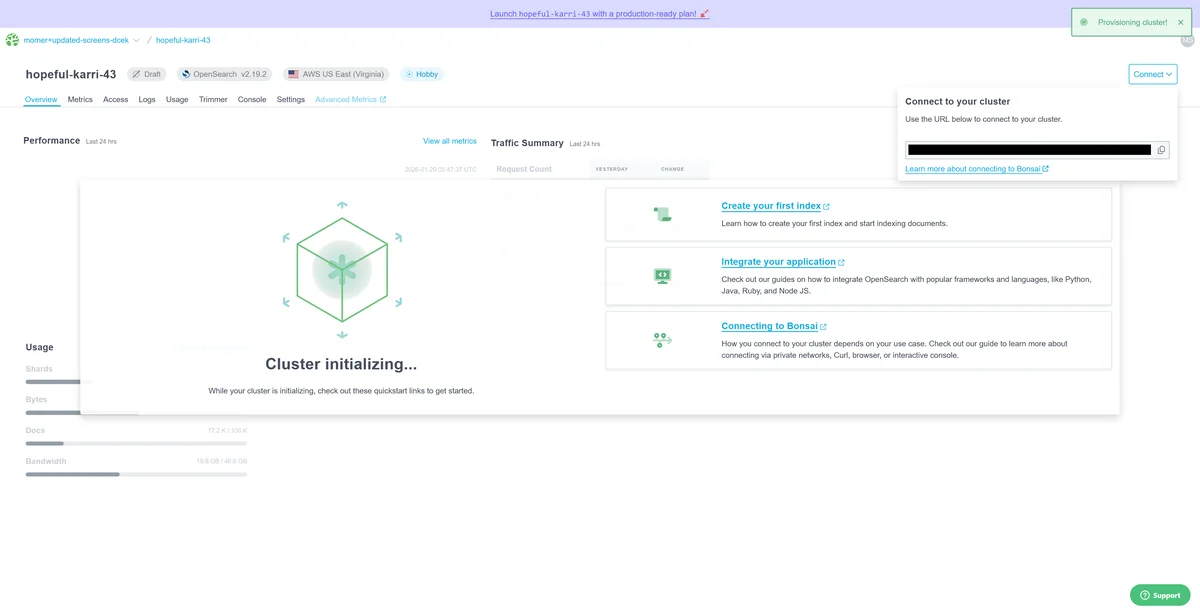
Cluster provisioning
Your cluster will provision in seconds. You may briefly see this screen while it spins up.
Cluster ready
Once provisioned, you'll see your Bonsai dashboard with your cluster ready to use.
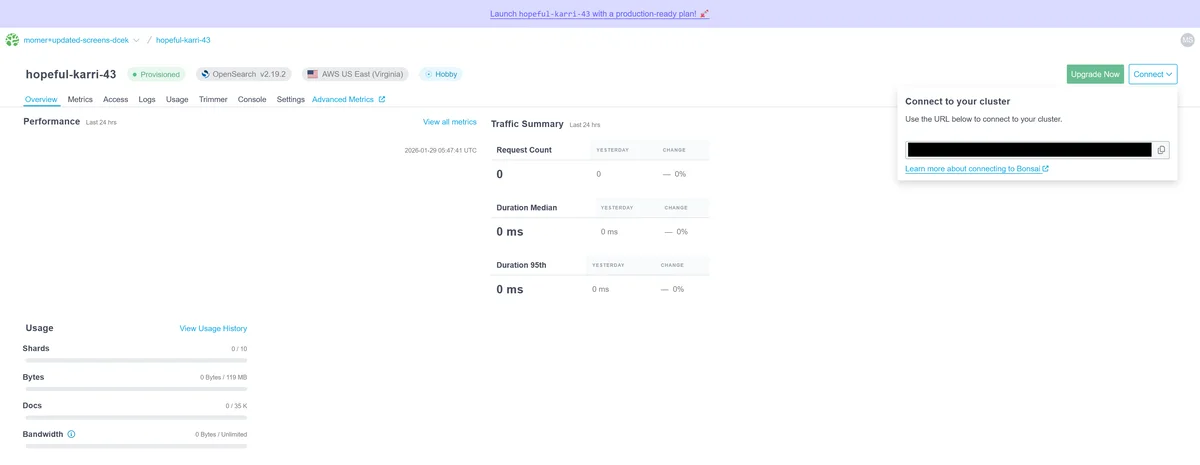
Get Your Connection Details
Every Bonsai cluster has a unique URL that includes authentication credentials. This single URL is all you need to connect from any client library, CLI tool, or application.
Copy Your Credentialed URL
- Open your Bonsai dashboard
- Select your cluster
- On the "Connect" dropdown, copy the full URL (includes username and password)
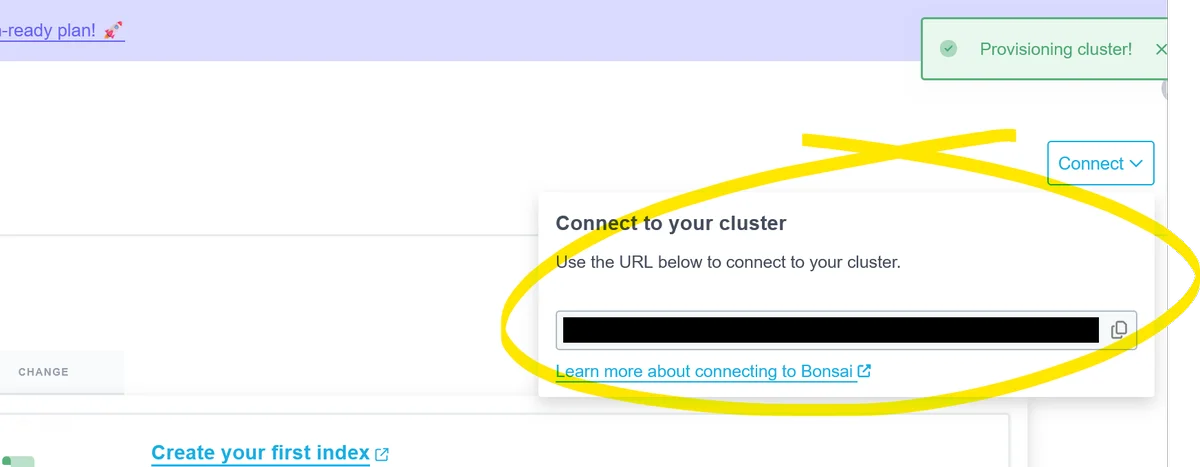
https://user:pass@cluster-slug.bonsai.io
Index Your First Document
Indexing is how you add data to your
cluster. Each document is a JSON object with fields you define. Elasticsearch/OpenSearch will automatically make it
searchable. For this quick start guide, we've included some sample interfaces, but you can interact with OpenSearch with
virtually any programming language!
- Open your Bonsai Console
- Navigate to your cluster's Console tab
- In the query editor, enter:
PUT /my-index/_doc/1
{
  "title": "Hello Bonsai",
  "message": "My first document"
}
Click the Play button or press Ctrl+Enter to run the query.
Expected result:
{
  "result": "created",
  "_index": "my-index",
  "_id": "1"
}
- Open OpenSearch Dashboards (link in your Bonsai dashboard)
- Go to Dev Tools in the left sidebar
- In the console, enter:
PUT /my-index/_doc/1
{
  "title": "Hello Bonsai",
  "message": "My first document"
}
Click the Play button (green triangle) to execute the request.
Expected result:
{
  "result": "created",
  "_index": "my-index",
  "_id": "1"
}
Run this command in your terminal:
curl -X PUT "$BONSAI_URL/my-index/_doc/1" \
  -H "Content-Type: application/json" \
  -d '{
    "title": "Hello Bonsai",
    "message": "My first document"
  }'
Make sure $BONSAI_URL includes your credentials: https://user:pass@cluster-slug.bonsai.io
Expected result:
{
  "result": "created",
  "_index": "my-index",
  "_id": "1",
  "_version": 1,
  "_primary_term": 1,
  "_seq_no": 0
}
For a complete TypeScript example using NestJS, see our guide:
NestJS + Bonsai GuideThis guide demonstrates creating an index and seeding it with data in a NestJS application.
Run Your First Search Query
Now for the payoff: run a search query against
your indexed data. The match query finds documents containing your search terms, with results ranked by
relevance.
- In your cluster's Console tab, enter:
GET /my-index/_search
{
  "query": {
    "match": {
      "title": "hello"
    }
  }
}
Click the Play button or press Ctrl+Enter to run the query.
Expected result:
{
  "hits": {
    "total": {
      "value": 1
    },
    "hits": [
      {
        "_source": {
          "title": "Hello Bonsai",
          "message": "My first document"
        }
      }
    ]
  }
}
- In Dev Tools, enter:
GET /my-index/_search
{
  "query": {
    "match": {
      "title": "hello"
    }
  }
}
Alternatively, use the Discover tab to visually browse and search your indexed data.
Expected result:
{
  "hits": {
    "total": {
      "value": 1
    },
    "hits": [
      {
        "_source": {
          "title": "Hello Bonsai",
          "message": "My first document"
        }
      }
    ]
  }
}
Run this command in your terminal:
curl -X GET "$BONSAI_URL/my-index/_search" \
  -H "Content-Type: application/json" \
  -d '{
    "query": {
      "match": { "title": "hello" }
    }
  }'
Expected result:
{
  "took": 5,
  "timed_out": false,
  "hits": {
    "total": {
      "value": 1,
      "relation": "eq"
    },
    "max_score": 0.2876821,
    "hits": [
      {
        "_index": "my-index",
        "_id": "1",
        "_score": 0.2876821,
        "_source": {
          "title": "Hello Bonsai",
          "message": "My first document"
        }
      }
    ]
  }
}
Integrate with Your App
Ready to add search to your application? Use our official client libraries to connect your codebase to Bonsai. Each library handles authentication, connection pooling, and retries automatically.
Install: npm install @opensearch-project/opensearch
const {Client} = require("@opensearch-project/opensearch");

// BONSAI_URL includes embedded credentials (https://user:pass@host)
const client = new Client({
    node: process.env.BONSAI_URL,
});

// Test the connection
(async () => {
    const health = await client.cluster.health();
    console.log("Cluster health:", health.body.status);
})();
Install: pip install opensearch-py
from opensearchpy import OpenSearch
import os

# BONSAI_URL includes embedded credentials (https://user:pass@host)
client = OpenSearch(os.environ['BONSAI_URL'])

# Test the connection
health = client.cluster.health()
print(f"Cluster health: {health['status']}")
Install: bundle add searchkick
# config/initializers/searchkick.rb
# Searchkick uses ELASTICSEARCH_URL by convention
ENV['ELASTICSEARCH_URL'] = ENV['BONSAI_URL']

# app/models/product.rb
class Product < ApplicationRecord
  searchkick
end

# Reindex your data
Product.reindex

# Search
results = Product.search("hello")
puts "Found #{results.count} results"
Install: go get github.com/opensearch-project/opensearch-go/v4
package main

import (
    "context"
    "fmt"
    "log"
    "os"

    "github.com/opensearch-project/opensearch-go/v4"
    "github.com/opensearch-project/opensearch-go/v4/opensearchapi"
)

func main() {
    client, err := opensearchapi.NewClient(opensearchapi.Config{
        Client: opensearch.Config{
            Addresses: []string{os.Getenv("BONSAI_URL")},
            Username:  os.Getenv("BONSAI_USERNAME"),
            Password:  os.Getenv("BONSAI_PASSWORD"),
        },
    })
    if err != nil {
        log.Fatalf("Error creating client: %s", err)
    }

    res, err := client.Cluster.Health(context.Background(), nil)
    if err != nil {
        log.Fatalf("Error getting health: %s", err)
    }
    fmt.Println("Cluster health:", res.Status)
}
Add to pom.xml: org.opensearch.client:opensearch-java
import org.apache.hc.client5.http.auth.AuthScope;
import org.apache.hc.client5.http.auth.UsernamePasswordCredentials;
import org.apache.hc.client5.http.impl.auth.BasicCredentialsProvider;
import org.apache.hc.core5.http.HttpHost;
import org.opensearch.client.opensearch.OpenSearchClient;
import org.opensearch.client.transport.httpclient5.ApacheHttpClient5TransportBuilder;

import java.net.URI;

String connString = System.getenv("BONSAI_URL");
URI connUri = URI.create(connString);
String[] auth = connUri.getUserInfo().split(":");

BasicCredentialsProvider cp = new BasicCredentialsProvider();
cp.setCredentials(new AuthScope(connUri.getHost(), connUri.getPort()),
    new UsernamePasswordCredentials(auth[0], auth[1].toCharArray()));

HttpHost host = new HttpHost(connUri.getScheme(), connUri.getHost(), connUri.getPort());
OpenSearchClient client = new OpenSearchClient(
    ApacheHttpClient5TransportBuilder.builder(host)
        .setHttpClientConfigCallback(b -> b.setDefaultCredentialsProvider(cp))
        .build());
Install: composer require opensearch-project/opensearch-php guzzlehttp/guzzle
<?php
require 'vendor/autoload.php';

// Parse BONSAI_URL for connection details
$url = parse_url(getenv('BONSAI_URL'));
$baseUri = $url['scheme'] . '://' . $url['host'] . (isset($url['port']) ? ':' . $url['port'] : '');

$client = (new \OpenSearch\GuzzleClientFactory())->create([
    'base_uri' => $baseUri,
    'auth' => [$url['user'], $url['pass']],
]);

// Test the connection
$health = $client->cluster()->health();
echo "Cluster health: " . $health['status'];
