At Bonsai, we understand that search is a critical component for any data-driven application. We are all-in on search, and focus our efforts on optimizing Elasticsearch and OpenSearch for unparalleled performance, scalability, and reliability. We handle all the complexities of optimizing and managing search infrastructure, so you can focus on building your application without worrying about relevance, performance, or downtime.
Our new Terraform provider simplifies the creation and management of Elasticsearch and OpenSearch clusters, enabling engineering teams to integrate powerful search capabilities directly alongside the rest of their Terraform infrastructure code.
Seamlessly integrate world-class search functionality into your infrastructure and deliver the fast, reliable search experience your users demand!
What is Elasticsearch?
Elasticsearch is a distributed, RESTful search and analytics engine that is used to query, index, and store JSON data.
For more details, check out our blog post, "What is Elasticsearch? And why you should use it"
What is OpenSearch?
OpenSearch is a community-driven, open-source search and analytics suite derived from Apache 2.0 licensed Elasticsearch 7.10.2 & Kibana 7.10.2.
For more details, check out our blog post, "What is OpenSearch? And why you should use it"
Create an Elasticsearch or OpenSearch cluster with the Bonsai.io Terraform Provider
1. Create API Key and Secret
The Bonsai Terraform Provider works by integrating with the Bonsai REST API via the ( also newly created) Bonsai Cloud Go API Client. To create resources with the Bonsai API, you'll need a way to authenticate your requests. Currently, both the Bonsai Go API Client and the Bonsai Terraform Provider support HTTP Basic Authentication over TLS, using an API Key and Secret Token combination.
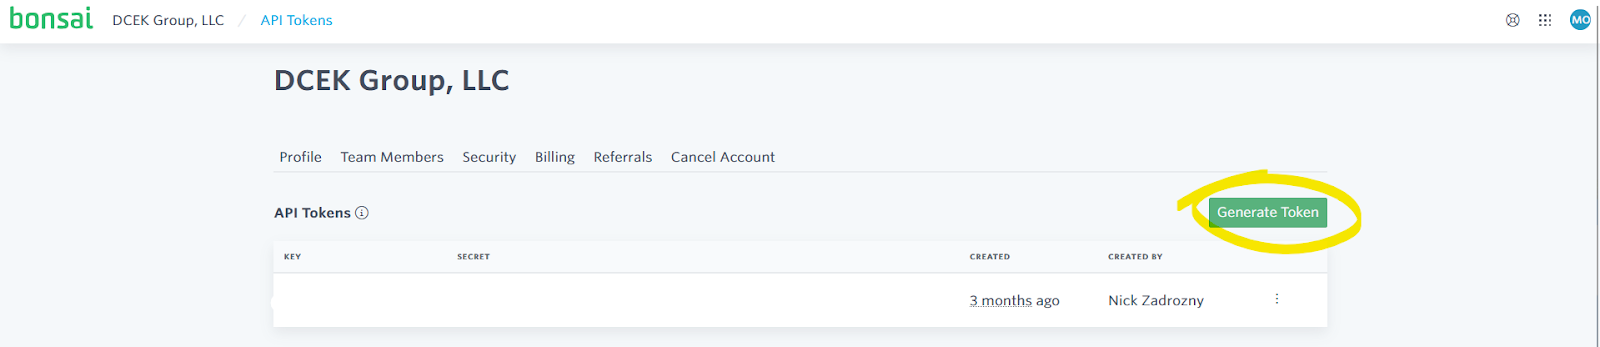
To generate an API Key and Secret Token, head over to your account's API Tokens overview page.
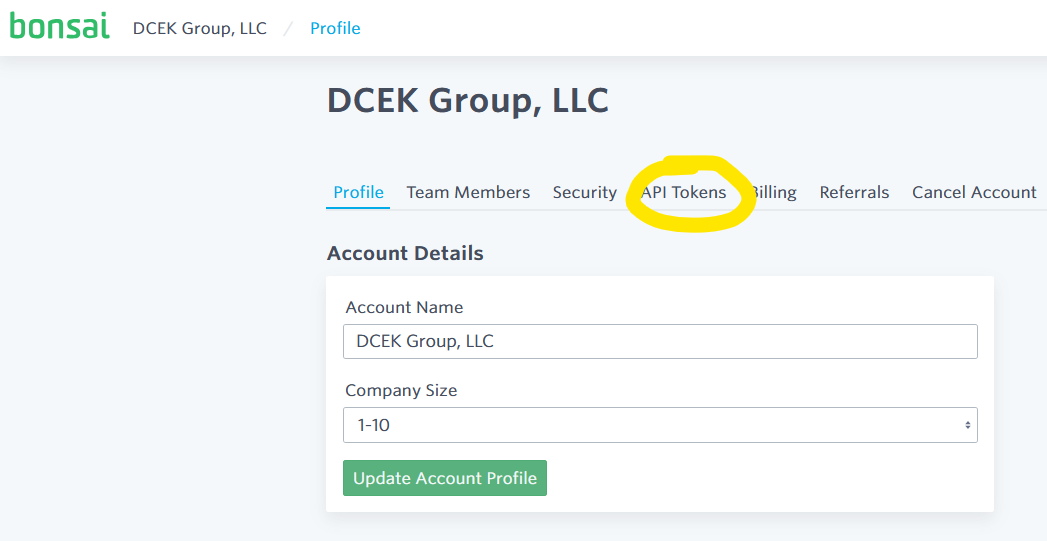
and click the "Generate Token" button.
2. Configure the Terraform Provider
Next, you'll need to configure the Bonsai Terraform Provider with the API Key and Token pair generated in the previous step.
There are two options here:
- Implicitly configure the provider by setting the
BONSAI_API_KEYandBONSAI_API_TOKENenvironment variables in the environment that will execute your Terraform code, or, - Explicitly configure the provider by setting the
api_keyandapi_tokenprovider variables in terraform, as detailed below.
Choose an option that best fits your use case, and you're ready to start creating Elasticsearch and OpenSearch clusters!
# provider.tf

# Configure the Bonsai Provider using the required_providers stanza.
terraform {
    required_providers {
        bonsai = {
            source = "omc/bonsai"
            version = "~> 1.0"
        }
    }
}

provider "bonsai" {
    # Default: The Bonsai Terraform Provider will fetch the api_key
    configuration
    # value from the BONSAI_API_KEY environment variable.
    #
    # Uncomment the following line to set directly via variable.
    # api_key = var.bonsai_api_key
    # Default: The Bonsai Terraform Provider will fetch the api_token
    configuration
    # value from the BONSAI_API_TOKEN environment variable.
    #
    # Uncomment the following line to set directly via variable.
    # api_token = var.bonsai_api_token
}
3. Configure the Terraform Resources
Configuring a Bonsai Elasticsearch or OpenSearch cluster is easy, we only need to make 4 decisions, reflected as Terraform Resource Attributes for our cluster:
name: The human-readable name of the cluster.plan: The subscription plan.space: The space describing the server group and geographic location of the cluster.some text- For AWS, these follow the format of
omc/bonsai/$REGION/common, where$REGIONis an AWS Region. - For GCP, these follow the format of
omc/bonsai-gcp/$REGION/common, where$REGIONis a GCP Region.
- For AWS, these follow the format of
release: The version of Elasticsearch or OpenSearch to be deployed.
Details about the plans, spaces, and releases available to your account are available either within the Bonsai.io control plane, via the API (we recommend using the Bonsai Cloud Go API Client), or via the Terraform Data Sources.
Here's an example of listing all available Plans, Releases, and Spaces.
# data.tf

// Fetch all Available Bonsai Plans
data "bonsai_plans" "list" {}

// Fetch all Available Bonsai Spaces
data "bonsai_spaces" "list" {}

// Fetch all Available Bonsai Releases
data "bonsai_releases" "list" {}

// Output collected data
output "bonsai_spaces" {
value = data.bonsai_spaces.list
}

output "bonsai_release" {
value = data.bonsai_releases.list
}

output "bonsai_plans" {
value = data.bonsai_plans.list
}
With that output, we can create an optimized OpenSearch cluster that matches our needs.
# main.tf

resource "bonsai_cluster" "test" {
name = "Terraform Created Cluster"
plan = {
slug = "sandbox"
}

    space = {
        path = "omc/bonsai/us-east-1/common"
    }

    release = {
        slug = "opensearch-2.19.4"
    }
}
4. Configure the Terraform Outputs
And finally, we'll configure our infrastructure data output, so that we can reference our newly created cluster directly in the rest of our infrastructure.
We also recommend encrypting your Terraform state at rest, and if possible, before storage.
output "bonsai_cluster_id" {
value = bonsai_cluster.test.id
}
output "bonsai_cluster_name" {
value = bonsai_cluster.test.name
}
output "bonsai_cluster_host" {
value = bonsai_cluster.test.access.host
}
output "bonsai_cluster_port" {
value = bonsai_cluster.test.access.port
}
output "bonsai_cluster_scheme" {
value = bonsai_cluster.test.access.scheme
}
output "bonsai_cluster_url" {
value = bonsai_cluster.test.access.url
}
output "bonsai_cluster_slug" {
value = bonsai_cluster.test.slug
}
output "bonsai_cluster_user" {
value = bonsai_cluster.test.access.user
sensitive = true
}
output "bonsai_cluster_password" {
value = bonsai_cluster.test.access.password
sensitive = true
}
output "bonsai_cluster_state" {
value = bonsai_cluster.test.state
}
output "bonsai_cluster_stats" {
value = bonsai_cluster.test.stats
}
5. [Optional] Use the OpenSearch Terraform Provider to configure an OpenSearch Cluster
Using the OpenSearch Terraform Provider, we can go even further, and configure our newly created Bonsai OpenSearch Cluster, bringing the whole deployment into our Infrastructure as Code.
Here, we're creating a simple index as an example, but the sky's the limit - check out the provider's documentation for more ideas!
# main.tf
provider "opensearch" {
url = "https://user:password@terraform-created-cl-999999999.us-east-
1.bonsaisearch.net:443"
}

# Create a new index on our OpenSearch Cluster
resource "opensearch_index" "name_index" {
name = "terraform-created-index-000001"
number_of_shards = "1"
number_of_replicas = "1"
mappings = <
6. Visit the Cluster's Kibana dashboard
With our configuration and deployment complete, we can head over to the Dashboard that Bonsai automatically configures for us, and begin checking the data in our cluster!
Head to the Cluster page in the Bonsai.io UI, and click on the "OpenSearch Dashboards" button in the bottom left.
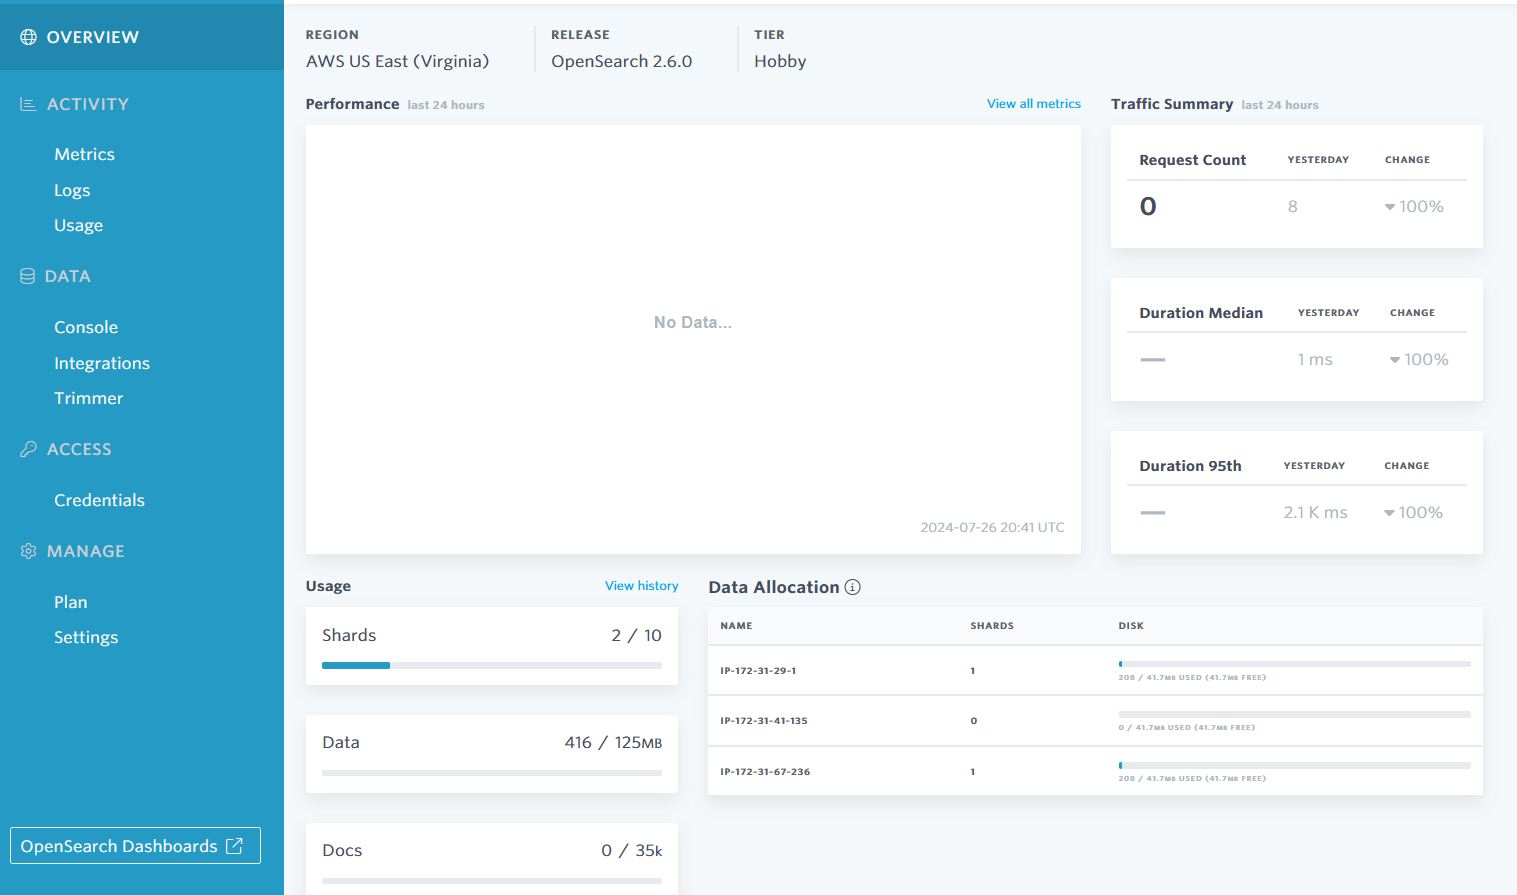
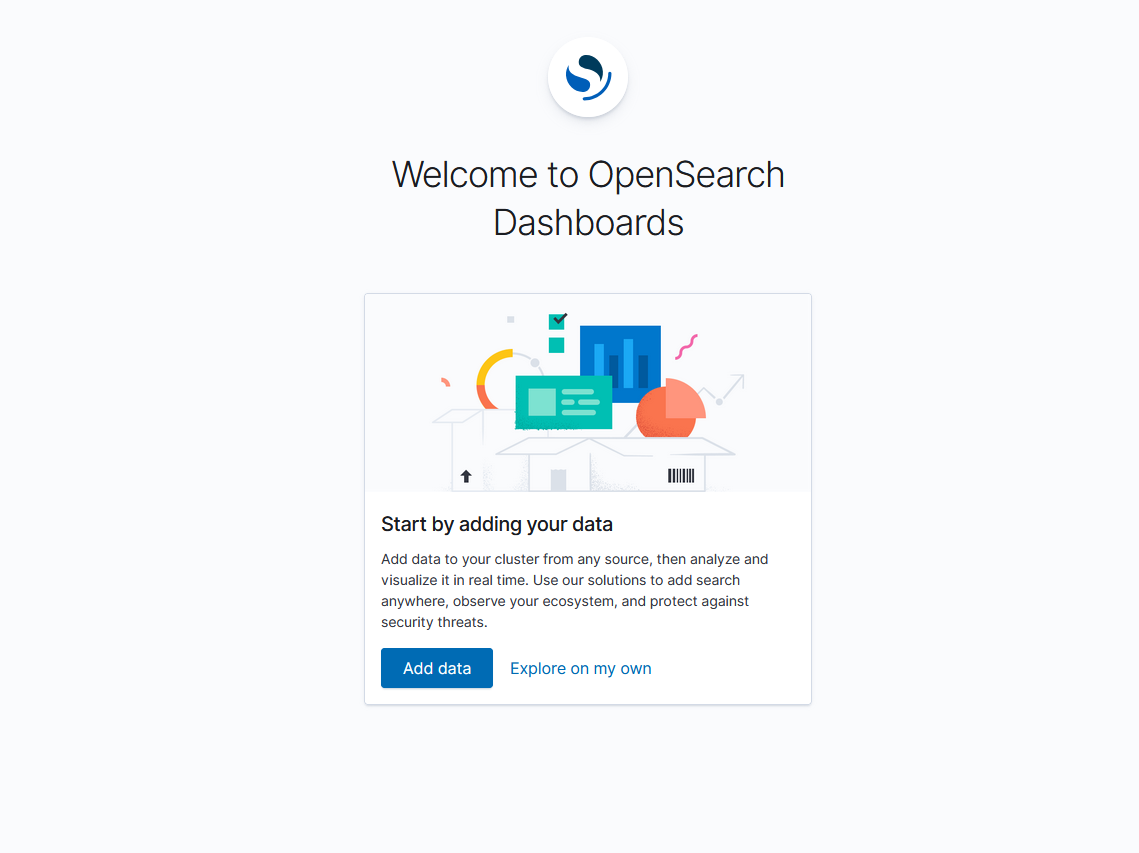
After a brief loading and initial configuration period (the cold-start for this new cluster was ~10 seconds), we see the OpenSearch Dashboards welcome page!
Next Steps for your managed Elasticsearch / OpenSearch cluster
Now that you're live with the Bonsai Search stack and fully integrated within your Infrastructure as Code in Terraform, send us an email and we'll happily work with you to understand where you are on your search journey and where you want to go. We're excited to help you take your search to the next level!
Ready to power your search with AI?
Launch a fully managed Elasticsearch or OpenSearch cluster, with built-in vector search and AI capabilities.
Learn how a managed service works and why it’s valuable to dev teams
You won’t be pressured or used in any manipulative sales tactics
We’ll get a deep understanding of your current tech stack and needs
Get the information you need to decide whether to go with Bonsai
Or, schedule a consultation:
