In this post, we’ll walk through a NestJS application that tracks your favorite movie titles, which also happen to be the set of movie titles uploaded to Kaggle by Cornell University in their Movie Dialog Corpus.
Throughout this series, we'll walk through some of the problems that you'll encounter as you deploy and manage a growing search database: things like keeping your search database in-sync with your relational database, creating pipelines, and more.
If you're here, you already know that search is essential to delivering a fast and intuitive experience for your users. Whether you're handling product catalogs, user-generated content, or large datasets, adding search to your NestJS application can take your app to the next level. Finding the right tools to get started can be a little time-consuming, though, so we're working on a series of tutorials to help navigate the path from zero to one.
We're going to start at day 0: demonstrating how to easily integrate Elasticsearch or OpenSearch into your NestJS app and seed it with a static dataset from your application.
Day 0: Getting started with the Bonsai Movie App
Today, we'll be working with a back-end Node.js application built with the progressive NestJS framework. For those unfamiliar, NestJS has grown in popularity in-part due to its opinionated and modular nature. While we'll cover other back-end frameworks in the future, Nest's opinionated nature also lends itself to being a fantastic starting point for our series.
Getting the code
To get started, you'll need to clone our example code repository at https://github.com/omc/bonsai-examples!
Once you've cloned the repository, check out the nestjs/pre-search branch -
we'll work our way forwards to parity with
the nestjs/with-elasticsearch branch in the coming sections!
# Fetch the remote git branches
git fetch

# Switch to the nestjs/pre-search branch
git switch nestjs/pre-search
Finally, enter the back-end/nestjs directory: this appropriately named
directory is where we'll spend the duration
of the tutorial in!
A tour of the movies module
Our simple application is primarily, and only, responsible for serving up details about our favorite movies. We can find an individual movie's metadata if we know its exact title, or we can see all of the movies' data if we paginate over a series of responses.
The code responsible for handling this functionality lives within the movies module.
src/movies/
├── domain
│ └── movie.ts
├── dto
│ ├── create-movie.dto.ts
│ ├── query-movie.dto.ts
│ └── update-movie.dto.ts
├── infrastructure
│ └── persistence
│ ├── movie.repository.ts
│ └── relational
│ ├── entities
│ │ └── movie.entity.ts
│ ├── mappers
│ │ └── movie.mapper.ts
│ ├── relational-persistence.module.ts
│ └── repositories
│ └── movie.repository.ts
├── movies.controller.ts
├── movies.module.ts
└── movies.service.ts
What we're interested in, specifically, is the fact that our
movies.controller.ts currently only supports two actions to fetch our movies:
- Get by
title(GET /api/v1/movies/:title) - Get all movies (
GET /api/v1/movies)
Our goal is simple, yet powerful: augment our application to allow us to search for a partial title match!
Set up and run the application locally
Now that we've got a little familiarity with the application's structure, let's go ahead and configure our development environment and start running the development server.
-
First, we'll need to copy the
env-examplefile to.env:cp ./env-example ./.env -
Next, we'll install our application's dependencies:
npm install -
Now we're ready to run a PostgreSQL database locally, via docker
# To run this detached, run `docker compose up -d postgres`, but beware of silent failures! docker compose up postgres -
Open another terminal, and run the database migrations:
npm run migration:run -
Seed the database with our favorite movie titles. We'll revisit this piece in the next section!
npm run seed:run:relational -
And finally, start our development server:
npm run start:dev
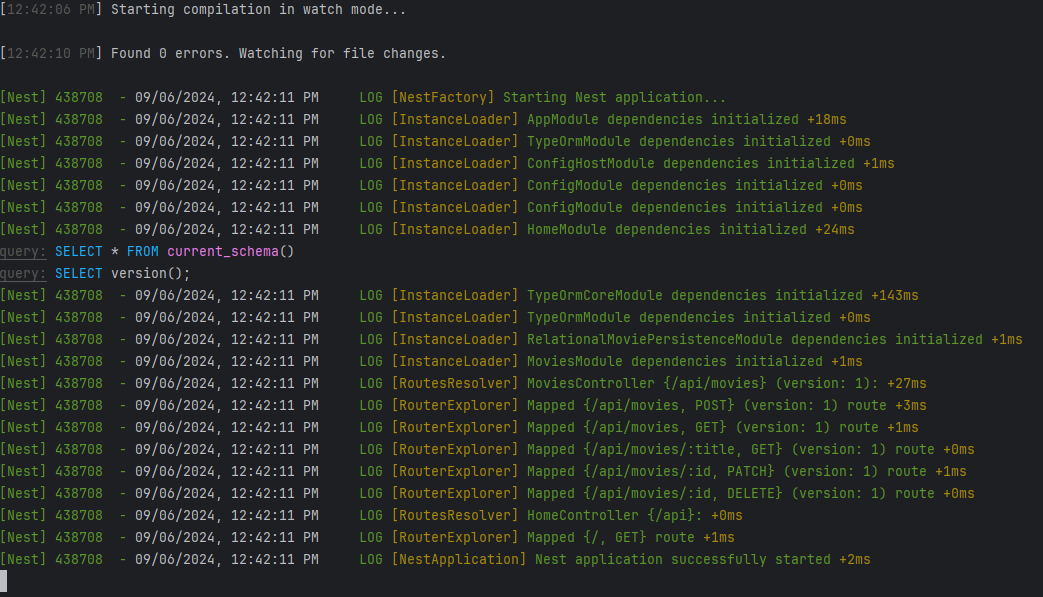
Phew! After all of that, you should see terminal output similar to:
To confirm that your application is serving up the data we expect, try issuing a request to list a page of all of our favorite movies:
curl localhost:3000/api/v1/movies
You should see a response like the following:

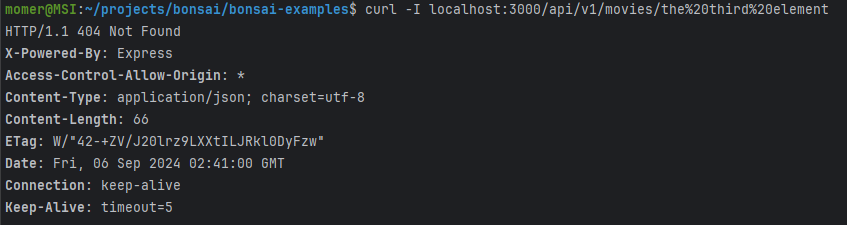
Which is great, because I need to pull up the details on a really great movie. But, I just can't seem to find it via exact-search. I think it's called, "The Third Element":
curl -I localhost:3000/api/v1/movies/the%third%20element
We'll see that it's either not there (unlikely), or I've misremembered the name (likely):
If only there was a way to get a search integrated into my application to help me remember some of my favorite movie titles...
Adding Elasticsearch/OpenSearch
With our application running, it's time to supercharge our application with a bit of search magic.
Setting up a local Elasticsearch/OpenSearch cluster
We'll be using Docker again to host the latest addition to our application stack: Elasticsearch.
From the following snippet of code, add the Elasticsearch service definition to
your docker-compose.yml file:
# Apache License v2.0, January 2004

# Courtesy of the CNCF project, Jaeger @ https://github.com/jaegertracing/jaeger

elasticsearch:
  image: docker.elastic.co/elasticsearch/elasticsearch:7.10.2
  environment:
    - discovery.type=single-node
    - http.host=0.0.0.0
    - transport.host=127.0.0.1
    - xpack.security.enabled=false # Disable security features
    - xpack.security.http.ssl.enabled=false # Disable HTTPS
    - action.destructive_requires_name=false
    - xpack.monitoring.collection.enabled=false # Disable monitoring features
  ports:
    - "9200:9200"
Once you've saved that file, start both the postgres and elasticsearch
services:
docker compose up postgres elasticsearch
And add these environment variables to your .env file:
ELASTICSEARCH_NODE=http://localhost:9200
ELASTICSEARCH_USERNAME=elastic
ELASTICSEARCH_PASSWORD=
Seeding Elasticsearch/OpenSearch with Movie Data
Since, at this stage of our application, we know all of our favorite movies
ahead-of-time, we're going to pursue a
straight-forward approach to synchronizing our search and relational databases:
after we've inserted all of our favorite
movies into the relational database, we'll turn-around and insert them into our
search database as well - the catch
being that they'll hold the same id attribute in both databases, making our
search query results directly
referential in our relational database!
Configuring Elasticsearch in the NestJS Application
Before we move into code, let's add a couple of relevant dependencies to our application:
npm add @nestjs/elasticsearch @elastic/elasticsearch@7.13.0
And, we'll add relevant Elasticsearch connection configuration in
src/database/, alongside our PostgreSQL configuration, by creating a few
files:
src/database/config/search-config.type.ts
// src/database/config/search-config.type.ts
export type SearchAuth = {
  username?: string;
  password?: string;
};

export type SearchConfig = {
  node?: string;
  auth: SearchAuth;
};
src/database/config/search.config.ts
// src/database/config/search.config.ts
import { ConfigModule, ConfigService, registerAs } from '@nestjs/config';
import { ElasticsearchModuleAsyncOptions } from '@nestjs/elasticsearch';

import { IsOptional, IsString, ValidateIf } from 'class-validator';
import validateConfig from '../../utils/validate-config';
import { SearchConfig } from './search-config.type';

class EnvironmentVariablesValidator {
  @ValidateIf((envValues) => !envValues.ELASTICSEARCH_NODE)
  @IsString()
  ELASTICSEARCH_NODE: string;

  @IsString()
  @IsOptional()
  ELASTICSEARCH_PASSWORD: string;

  @IsString()
  @IsOptional()
  ELASTICSEARCH_USERNAME: string;
}

export const elasticSearchModuleOptions: ElasticsearchModuleAsyncOptions = {
  imports: [ConfigModule],
  inject: [ConfigService],
  useFactory: (configService: ConfigService) => {
    const username = configService.get('elasticSearch.auth.username', {
      infer: true,
    });
    const opts = {
      node: configService.get('elasticSearch.node', { infer: true }),
    };

    if (username) {
      const authOpts = {
        auth: {
          username: username,
          password: configService.get('elasticSearch.auth.password', {
            infer: true,
          }),
        },
      };
      return { ...opts, ...authOpts };
    }
    return opts;

  },
};

export default registerAs('elasticSearch', () => {
  validateConfig(process.env, EnvironmentVariablesValidator);

  return {
    node: process.env.ELASTICSEARCH_NODE,
    auth: {
      username: process.env.ELASTICSEARCH_USERNAME,
      password: process.env.ELASTICSEARCH_PASSWORD,
    },
  };
});
src/database/search/search.module.ts
// src/database/search/search.module.ts
import { Module } from '@nestjs/common';
import { ConfigModule } from '@nestjs/config';
import { ElasticsearchModule } from '@nestjs/elasticsearch';
import { elasticSearchModuleOptions } from '../config/search.config';

@Module({
  imports: [
    ConfigModule,
    ElasticsearchModule.registerAsync(elasticSearchModuleOptions),
  ],
  exports: [ElasticsearchModule],
})
export class SearchModule {
}
And, last but not least for configuration, we'll need to add the search configuration to our App's module:
// src/app.module.ts
import { Module } from '@nestjs/common';
import { MoviesModule } from './movies/movies.module';
import databaseConfig from './database/config/database.config';
import searchConfig from './database/config/search.config';
import appConfig from './config/app.config';
import { ConfigModule } from '@nestjs/config';
import { TypeOrmModule } from '@nestjs/typeorm';
import { TypeOrmConfigService } from './database/typeorm-config.service';
import { HomeModule } from './home/home.module';
import { DataSource, DataSourceOptions } from 'typeorm';
import { SearchModule } from './database/search/search.module';

const infrastructureDatabaseModule = TypeOrmModule.forRootAsync({
  useClass: TypeOrmConfigService,
  dataSourceFactory: async (options: DataSourceOptions) => {
    return new DataSource(options).initialize();
  },
});

@Module({
  imports: [
    ConfigModule.forRoot({
      isGlobal: true,
      load: [databaseConfig, searchConfig, appConfig],
      envFilePath: ['.env'],
    }),
    infrastructureDatabaseModule,
    MoviesModule,
    HomeModule,
    SearchModule,
  ],
})

export class AppModule {
}
Using Elasticsearch in the NestJS Application
Now that our application is configured to use Elasticsearch, we can get start
writing in our search features. We'll
begin by adding an interface that describes our movie-search-response items, in
src/movies/interfaces/movie-search-document.interface.ts.
// src/movies/interfaces/movie-search-document.interface.ts
export interface MovieSearchDocument {
  id: number;
  title: string;
}
Followed by a MoviesSearchService service in
src/movies/movies-search.service.ts file, which will encapsulate our
application's interactions with the
search database:
// src/movies/movies-search.service.ts
import { Injectable } from '@nestjs/common';
import { ElasticsearchService } from '@nestjs/elasticsearch';
import { RequestParams } from '@elastic/elasticsearch';
import {
  MovieEntity
} from './infrastructure/persistence/relational/entities/movie.entity';
import { ApiResponse, Context } from '@elastic/elasticsearch/lib/Transport';
import {
  MovieSearchDocument
} from './interfaces/movie-search-document.interface';

@Injectable()
export class MoviesSearchService {
  index = 'movies';

  constructor(private readonly elasticsearchService: ElasticsearchService) {
  }

  async existsIndex(): Promise {
    const request: RequestParams.IndicesExists = {
      index: this.index,
    };
    return this.elasticsearchService.indices.exists(request);
  }

  async statusIndex(): Promise {
    const request: RequestParams.ClusterHealth = {
      index: this.index,
    };
    return this.elasticsearchService.cluster.health(request);
  }

  async createIndex(): Promise {
    const request: RequestParams.IndicesCreate = {
      body: {
        settings: {
          index: {
            number_of_shards: 1,
            number_of_replicas: 1, // for local development
          },
        },
      },
      index: this.index,
    };
    return this.elasticsearchService.indices.create(request);
  }

  async indexMovies(movies: MovieEntity[]): Promise {
    const idx = this.index;
    const body = movies.flatMap((movie) => {
      const doc: MovieSearchDocument = { id: movie.id, title: movie.title };
      return [{ index: { _index: idx } }, doc];
    });
    const request: RequestParams.Bulk = {
      refresh: true,
      body,
    };
    return this.elasticsearchService.bulk(request);
  }

  async count(query: string, fields: string[]) {
    const {
      body: result,
    }: ApiResponse<
      Record,
      Context
    > = await this.elasticsearchService.count({
      index: this.index,
      body: {
        query: {
          multi_match: {
            query,
            fields,
          },
        },
      },
    });
    return result.count;
  }

  async search(text: string, offset?: number, limit?: number, startId = 0) {
    let separateCount = 0;
    if (startId) {
      separateCount = await this.count(text, ['title']);
    }
    const params: RequestParams.Search = {
      index: this.index,
      from: offset,
      size: limit,
      body: {
        query: {
          match: {
            title: text,
          },
        },
      },
    };
    const { body: result } = await this.elasticsearchService.search(params);
    const count = result.hits.total.value;
    const results = result.hits.hits.map((item) => item._source);
    return {
      count: startId ? separateCount : count,
      results,
    };
  }
}
The MoviesSearchService currently provides a just a few of functions that will
enable us to load our
search database with movies, along with
some others that will help us determine the status of our index:
-
createIndex: to create our new inex. -
indexMovies: to bulk-add movies to the search index. -
count: to discover how many matches we have for a given query. -
search: to search for our document, with optional arguments like document offset, etc. -
existsIndex,statusIndex: to determine whether the index exists, and its status.
To use this new functionality, we'll take a detour out of our NestJS application
modules, and head over to src/database/seeds/, where we'll create a new directory: search.
This new search directory will hold the scripts responsible for seeding our
search database with
indexes after we've loaded our
relational database with movies.
We'll be adding similar files as to what's contained in the
src/database/seeds/relational directory, so let's also
create a sub-directory within search: src/database/seeds/search/movie.
Add these files in:
-
src/database/seeds/search/run-seed.ts- this file orchestrates our search-seeding routines// src/database/seeds/search/run-seed.ts import { NestFactory } from '@nestjs/core'; import { SeedModule } from './seed.module'; import { MovieSeedService } from './movie/movie-seed.service'; const runSeed = async () => { const app = await NestFactory.create(SeedModule); // run await app.get(MovieSeedService).run(); await app.close(); }; void runSeed(); -
src/database/seeds/search/seed.module.ts// src/database/seeds/search/seed.module.ts import { Module } from '@nestjs/common'; import { ConfigModule } from '@nestjs/config'; import { MovieSeedModule } from './movie/movie-seed.module'; import appConfig from '../../../config/app.config'; import searchConfig from '../../config/search.config'; import databaseConfig from '../../config/database.config'; import { TypeOrmModule } from '@nestjs/typeorm'; import { TypeOrmConfigService } from '../../typeorm-config.service'; import { DataSource, DataSourceOptions } from 'typeorm'; @Module({ imports: [ MovieSeedModule, ConfigModule.forRoot({ isGlobal: true, load: [databaseConfig, searchConfig, appConfig], envFilePath: ['.env'], }), TypeOrmModule.forRootAsync({ useClass: TypeOrmConfigService, dataSourceFactory: async (options: DataSourceOptions) => { return new DataSource(options).initialize(); }, }), ], }) export class SeedModule { } -
src/database/seeds/search/movie/movie-seed.service.ts// src/database/seeds/search/movie/movie-seed.service.ts import { Injectable } from '@nestjs/common'; import { InjectRepository } from '@nestjs/typeorm'; import { Repository } from 'typeorm'; import { MovieEntity } from '../../../../movies/infrastructure/persistence/relational/entities/movie.entity'; import { MoviesSearchService } from '../../../../movies/movies-search.service'; @Injectable() export class MovieSeedService { constructor( @InjectRepository(MovieEntity) private repository: Repository, private moviesSearchService: MoviesSearchService, ) { } async run() { // If index doesn't exist, create it and seed the database const exists = await this.moviesSearchService.existsIndex(); if (!exists.body) { await this.moviesSearchService.createIndex(); await this.moviesSearchService.statusIndex(); const insertedMovies = await this.repository.find({}); await this.moviesSearchService.indexMovies(insertedMovies); } } } -
To support the newly used
findmethod, we'll add that method into ourMovieRepository:-
Add the abstract definition to
src/movies/infrastructure/persistence/movie.repository.ts:// src/movies/infrastructure/persistence/movie.repository.ts ... abstract find(options?: FindManyOptions): Promise; ... -
And add the implementation to
src/movies/infrastructure/persistence/relational/repositories/movie.repository.ts:// src/movies/infrastructure/persistence/relational/repositories/movie.repository.ts ... async find(options?: FindManyOptions): Promise { return await this.moviesRepository.find(options); } ...
-
-
And we'll configure the
MovieSeedModulelocated atsrc/database/seeds/search/movie/movie-seed.module.ts// src/database/seeds/search/movie/movie-seed.module.ts import { Module } from '@nestjs/common'; import { MovieSeedService } from './movie-seed.service'; import { TypeOrmModule } from '@nestjs/typeorm'; import { MovieEntity } from '../../../../movies/infrastructure/persistence/relational/entities/movie.entity'; import { MoviesModule } from '../../../../movies/movies.module'; @Module({ imports: [TypeOrmModule.forFeature([MovieEntity]), MoviesModule], providers: [MovieSeedService], exports: [MovieSeedService], }) export class MovieSeedModule { }
Once we've added this, we'll also add a command-line interface command to our
package.json, allowing us to trigger the seeding of our search database from
the command-line: add the following line to the scripts section of your
package.json:
{
  "seed:run:search": "ts-node -r tsconfig-paths/register ./src/database/seeds/search/run-seed.ts"
}
And finally, let's go ahead and run that command to seed our search cluster with movie data!
npm run seed:run:search
We won't see much output at the command's terminal, but we can check via the Elasticsearch API to see that our favorite movies have been indexed:
curl "http://localhost:9200/_search?pretty=true&q=*:*"
Which responds something like the below (some metrics and IDs may be different)!
{
  "took": 92,
  "timed_out": false,
  "_shards": {
    "total": 1,
    "successful": 1,
    "skipped": 0,
    "failed": 0
  },
  "hits": {
    "total": {
      "value": 617,
      "relation": "eq"
    },
    "max_score": 1.0,
    "hits": [
      {
        "_index": "movies",
        "_id": "q_fOxZEB07qVS_LUa0y2",
        "_score": 1.0,
        "_source": {
          "id": 1,
          "title": "10 things i hate about you"
        }
      },
      ...
    ]
  }
}
Unlocking Movie Search, our killer feature!
Now that our search database is loaded-up with our favorite movie details, we're ready to create a public interface to that functionality in our application!
Re-open the MoviesService service in the src/movies/movies.service.ts
file, because we're going to be adding one new, important, service:
search: to, well, search for a movie!
You'll note that the updated MoviesService class has a new constructor and
some additional imports - update yours to match
the below.
// src/movies/movies.service.ts
import { Injectable } from '@nestjs/common';
import { ElasticsearchService } from '@nestjs/elasticsearch';
import { RequestParams } from '@elastic/elasticsearch';
import {
  MovieEntity
} from './infrastructure/persistence/relational/entities/movie.entity';
import { ApiResponse, Context } from '@elastic/elasticsearch/lib/Transport';
import {
  MovieSearchDocument
} from './interfaces/movie-search-document.interface';

@Injectable()
export class MoviesSearchService {
  // ...

  async search(text: string, offset?: number, limit?: number, startId = 0) {
    let separateCount = 0;
    if (startId) {
      separateCount = await this.count(text, ['title']);
    }
    const params: RequestParams.Search = {
      index: this.index,
      from: offset,
      size: limit,
      body: {
        query: {
          match: {
            title: text,
          },
        },
      },
    };
    const { body: result } = await this.elasticsearchService.search(params);
    const count = result.hits.total.value;
    const results = result.hits.hits.map((item) => item._source);
    return {
      count: startId ? separateCount : count,
      results,
    };
  }

  // ...
}
Next, since we want to provide the option of using a search query, but we still want our movies index response to be paginated either way, the query and response types will need to be tweaked slightly:
-
In the
src/utils/dto/infinity-pagination-response.dto.tsfile, we'll need to make thehasNextPagemember optional. Update that entry to reflect this diff (add the question mark inhasNextPage?:)export class InfinityPaginationResponseDto { data: T[]; - hasNextPage: boolean; + hasNextPage?: boolean; } -
Then, we'll update our
QueryMovieDtoinsrc/movies/dto/query-movie.ts, which handles pagination options. We're going to add support for an offset-based pagination for Elasticsearch queries! Update yourQueryMovieDtodefinition to the below.// src/movies/dto/query-movie.ts export class QueryMovieDto { @ApiPropertyOptional() @Transform(({ value }) => (value ? Number(value) : 0)) @Type(() => Number) @Min(0) @IsNumber() @IsOptional() offset?: number; @ApiPropertyOptional({ type: String }) @IsOptional() @Type(() => Number) @IsNumber() @Min(1) startId?: number; @ApiPropertyOptional() @Transform(({ value }) => (value ? Number(value) : 1)) @IsNumber() @IsOptional() page?: number; @ApiPropertyOptional() @Transform(({ value }) => (value ? Number(value) : 10)) @IsNumber() @IsOptional() limit?: number; @ApiPropertyOptional({ type: String }) @IsOptional() @Transform(({ value }) => { return value ? plainToInstance(SortMovieDto, JSON.parse(value)) : undefined; }) @ValidateNested({ each: true }) @Type(() => SortMovieDto) sort?: SortMovieDto[] | null; } -
To handle this sort of pagination, we're going to return a new type for requests that hit the search database - one that contains the data and a count of the items returned. Create a new file,
src/utils/dto/search-response.dto.tswith contents// src/utils/dto/search-response.dto.ts import { ApiProperty } from '@nestjs/swagger'; import { IsArray, IsNumber } from 'class-validator'; export class SearchResponseDto { @ApiProperty() @IsArray() data: T[]; @ApiProperty() @IsNumber() count: number; } -
Finally, we're ready to update our controller's
findAllmethod, which is responsible for the index action, and now - search queries! Ensure your method looks like the below, including the annotations!
// src/movies/movies.controller.ts
@ApiOkResponse({
  type: InfinityPaginationResponse(Movie),
})
@Get()
@HttpCode(HttpStatus.OK)
async
findAll(
  @Query('search')
search: string,
@Query()
query: QueryMovieDto,
):
Promise | SearchResponseDto > {
  const page = query?.page ?? 1;
  let limit = query?.limit ?? 10;
  if(limit > 50
)
{
  limit = 50;
}

if (search) {
  return await this.moviesService.search(
    search,
    query?.offset,
    query?.limit,
    query?.startId,
  );
}
return infinityPagination(
  await this.moviesService.findManyWithPagination({
    sortOptions: query?.sort,
    paginationOptions: {
      page,
      limit,
    },
  }),
  { page, limit },
);
}
Now, blessedly, let's go ahead and run a query for that favorite movie of mine again, "The Third Element,"
Start our dev server
npm run start:dev
Query for our movie
curl localhost:3000/api/v1/movies?search=the%20third%20element
Lo and behold, it's not, "The Third Element,", it's, "The Fifth Element!"
{
  "data": [
    {
      "id": 6,
      "title": "the fifth element",
      "createdAt": "2024-09-06T07:25:45.588Z",
      "updatedAt": "2024-09-06T07:25:45.588Z",
      "deletedAt": null,
      "__entity": "MovieEntity"
    },
    {
      "id": 24,
      "title": "the avengers",
      "createdAt": "2024-09-06T07:25:45.669Z",
      "updatedAt": "2024-09-06T07:25:45.669Z",
      "deletedAt": null,
      "__entity": "MovieEntity"
    },
    {
      ...
    },
    ...
    }
Next steps for your newly supercharged NestJS application
Now that you've added search to your NestJS Application, you're ready to deploy into production! Check out our post, "Heroku and Bonsai, a Winning Search Combination", for a detailed tutorial on how to launch this application onto Heroku, using the Bonsai Heroku Addon!
There are a number of day-1 and day-2 features that we'll want to add into our application to get the most out of the newly-added search capabilities that we'll cover in future posts, so stay tuned for part 2 of this series!
Ready to power your search with AI?
Launch a fully managed Elasticsearch or OpenSearch cluster, with built-in vector search and AI capabilities.
Learn how a managed service works and why it’s valuable to dev teams
You won’t be pressured or used in any manipulative sales tactics
We’ll get a deep understanding of your current tech stack and needs
Get the information you need to decide whether to go with Bonsai
Or, schedule a consultation:
